Horizontal pulling exercises are fundamental for building a strong, muscular back and enhancing overall upper body symmetry. These exercises not only sculpt the muscles of the upper and mid-back but also play a crucial role in improving posture, preventing injuries, and boosting functional strength.
While many lifters tend to focus on pushing movements like bench presses, it’s essential to incorporate an equal or greater volume of pulling exercises to maintain muscular balance and joint health. (Generally, upper body pulling muscles can handle more volume than pushing muscles).
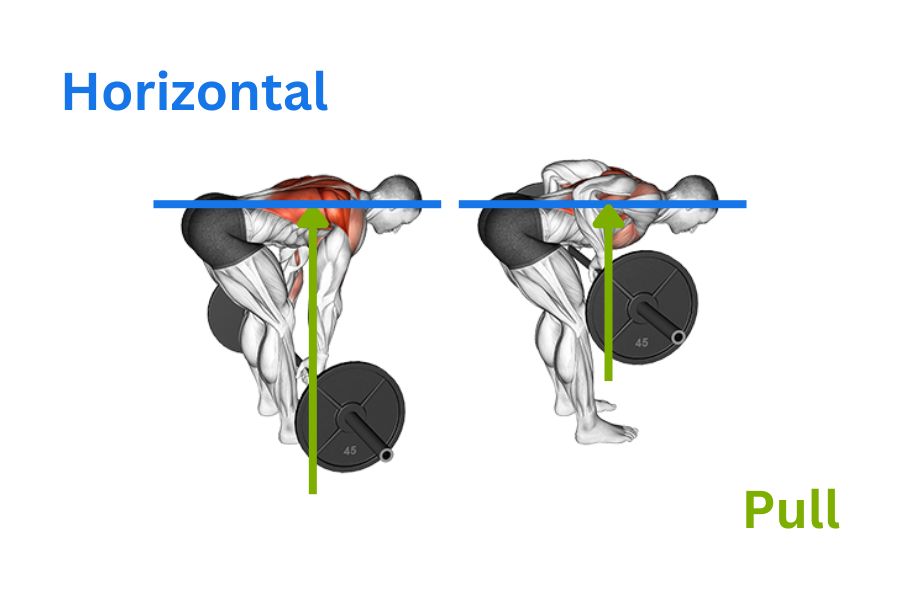
What is a Horizontal Pull Exercises?
In horizontal pull exercises, such as the bent-over row or seated row, the weight is pulled toward your body along a path that is perpendicular to the direction of your pull.
Horizontal pulls can be executed from various body positions, including:
Standing and bending over
Seated
Lying down, either prone (face down) or supine (face up)
These exercises primarily engage the muscles of the back, shoulders, and biceps.
Muscles Worked In Horizontal Pulling Exercises
Latissimus Dorsi: Commonly referred to as the “lats,” these large, fan-shaped muscles run along the sides of the back and are primarily responsible for shoulder adduction, extension, and internal rotation.
Rhomboids (Major and Minor): Located between the shoulder blades, the rhomboids retract and stabilize the scapula (shoulder blades) during pulling movements, helping to squeeze the shoulder blades together.
Trapezius (Mid and Lower Fibers): The middle fibers of the trapezius assist in retracting the scapula, while the lower fibers help depress and stabilize the scapula during horizontal pulls.
Posterior Deltoids: These are the rear portion of the shoulder muscles, playing a significant role in shoulder extension and horizontal abduction during pulling motions.
Biceps Brachii: The biceps, located on the front of the upper arm, are engaged in elbow flexion during pulling exercises, aiding in the movement.
Brachialis: Positioned underneath the biceps, the brachialis also assists in elbow flexion, providing additional pulling strength.
Brachioradialis: A forearm muscle that contributes to elbow flexion, the brachioradialis plays a supporting role in horizontal pulls, particularly when the grip is neutral or pronated.
Teres Major and Minor: These small muscles of the upper back assist in shoulder extension and adduction, stabilizing the shoulder joint during pulling movements.
Infraspinatus and Supraspinatus: Part of the rotator cuff, these muscles help with external rotation and stabilization of the shoulder during pulling motions.
Erector Spinae: Although primarily known for their role in spinal extension, the erector spinae muscles help maintain proper posture and spinal stability during horizontal pulls.
The Importance of Horizontal Pulling Exercises:
So, you’ve seen how many muscle horizontal pulls work, so here are a few reasons why you should ensure you have horizontal pulling exercises in your workout program.
1. Comprehensive Muscle Development
As mentioned above, horizontal pulling exercises primarily target the muscles of the upper back, including the latissimus dorsi, rhomboids, trapezius, and rear deltoids. By engaging these muscles, you can develop a thicker, more muscular back, which is essential for a balanced physique. Additionally, these exercises activate the biceps, forearms, and core, providing a comprehensive upper body workout.
2. Enhanced Postural Alignment
Modern lifestyles often involve prolonged sitting and poor posture, leading to rounded shoulders and a forward head position. Do a self-check right now; whether looking at a computer screen or looking down at your phone, your back is probably a little more rounded than it should be. Horizontal pulling exercises help counteract these issues by strengthening the muscles that retract and stabilize the shoulder blades, promoting a more upright posture. Consistently incorporating these exercises can reduce the risk of chronic neck and back pain associated with poor posture.
3. Injury Prevention and Joint Health
Imbalances between the chest and back muscles can lead to dysfunctional movement patterns and increased risk of shoulder injuries. By emphasizing horizontal pulling, you ensure that the muscles responsible for scapular retraction and stabilization are strong, providing the necessary support for shoulder health. This balance is crucial for athletes and gym-goers alike, as it allows for safer, more efficient movement across various activities.
4. Improved Functional Strength and Athletic Performance
Pulling movements are integral to many athletic endeavors, such as rowing, climbing, and grappling. Strengthening the muscles involved in these actions can enhance overall performance, whether you’re lifting weights, participating in sports, or simply performing everyday tasks like pulling open a door. A strong back provides a stable foundation for pushing, pulling, and rotational movements, contributing to overall functional fitness.
5 Key Horizontal Pull Exercises
So, we could list dozens of horizontal pull exercises, but that would leave you having to try and figure out what works. Instead here is a list of five of our favorite exercises.
1. Bent-Over Row
Muscles Worked: Latissimus dorsi, rhomboids, traps, posterior deltoids, biceps.
Execution Steps:
Stand with your feet hip-width apart, holding a barbell or dumbbells with an overhand grip.
Bend your knees slightly and hinge at the hips, keeping your back flat and torso nearly parallel to the floor.
Pull the barbell towards your lower ribs, driving your elbows behind you and squeezing your shoulder blades together.
Lower the weights in a controlled manner, extending your arms fully without losing tension in your back.
Advanced Tips: To increase the intensity, slow down the eccentric (lowering) phase of the movement or add pauses at the top for an extra squeeze.
Related: 7 Best Row Variations
2. Seated Cable Row
Muscles Worked: Middle back, lats, biceps, forearms.
Execution Steps:
Sit on a cable row machine, securing your feet on the footrests and grasping the handle with both hands.
Start with your arms extended, leaning slightly forward from the hips.
Pull the handle towards your torso, driving your elbows back and keeping your chest lifted. Squeeze your shoulder blades together as you pull.
Slowly return to the starting position, maintaining tension in your back muscles throughout the movement.
Advanced Tips: Experiment with different grip variations (neutral, underhand, wide) to target different areas of the back.
Related: Seated Cable Row Alternatives
3. Inverted Row (a.k.a The Australian Row)
Muscles Worked: Upper back, lats, rear deltoids, core, biceps.
Execution Steps:
Position yourself under a barbell secured at waist height, using an overhand grip slightly wider than shoulder-width.
Extend your legs out in front of you, keeping your body straight from head to heels.
Pull your chest towards the bar, focusing on squeezing your shoulder blades together at the top.
Lower yourself back to the starting position, maintaining a rigid plank-like posture.
Advanced Tips: Elevate your feet on a bench to increase the difficulty or add a weighted vest for progressive overload.
4. Single-Arm Dumbbell Row
Muscles Worked: Lats, traps, rhomboids, rear deltoids, core, biceps.
Execution Steps:
Position one knee and hand on a bench for support, holding a dumbbell in the opposite hand.
Keep your back flat and hinge forward slightly at the hips.
Row the dumbbell towards your hip, focusing on pulling with your back muscles rather than your arms.
Lower the dumbbell slowly, maintaining control throughout the movement.
Advanced Tips: Increase the range of motion by lowering the dumbbell fully, and perform slow negatives to enhance muscle activation.
5. T-Bar Row
Muscles Worked: Middle back, lats, traps, rear deltoids, biceps.
Execution Steps:
Straddle a T-bar row machine or a barbell with a V-handle attachment, with your feet shoulder-width apart.
Bend your knees slightly and hinge at the hips, maintaining a straight back.
Pull the bar towards your sternum, driving your elbows back and squeezing your shoulder blades together.
Lower the bar in a controlled manner, avoiding any jerky movements.
Advanced Tips: Adjust your grip width to target different parts of the back, and focus on keeping your core engaged to prevent lower back strain.
Three Bonus Movements
So, you have our top picks above, but we couldn’t leave these other variations out. And we think you’ll agree, there are some gems in here too!
Resistance Band Rows
Ideal for beginners or those seeking a low-impact option, resistance band rows offer consistent tension throughout the movement. Use them as a warm-up, finisher, or standalone exercise for high-rep conditioning.
Chest-Supported Row
By eliminating the lower back involvement, chest-supported rows allow you to isolate the upper back muscles more effectively. This variation reduces the risk of strain and helps maintain proper form, making it an excellent option for those with lower back issues.
Meadow Rows
A unique landmine variation that emphasizes unilateral strength and back development. By gripping the end of a barbell in a staggered stance, you can target the lats and rear deltoids with a greater range of motion and rotational component.
Common Mistakes to Avoid:
If you step foot into a gym, you’re most likely going to see one of the following being done. This is your PSA to start with lower weights and focus on form first!
Using Momentum: Relying on momentum reduces the effectiveness of the exercise and increases the risk of injury. Focus on controlled, deliberate movements, and engage your muscles fully through each rep.
Poor Posture: A rounded back or excessive arching can lead to strain and reduce the exercise’s benefits. Keep your core engaged, chest up, and shoulders retracted throughout the movement. This is especially true on cable rows, where it’s very easy to allow your back to round at the bottom of the movement.
Neglecting Full Range of Motion: Performing half-reps or rushing through the exercise limits muscle engagement and development. Ensure each rep includes a full stretch at the bottom and a complete squeeze at the top for maximum gains. Half-reps should only be included if you’re doing a burn-out set and you can’t physically get the weight up any higher.
Programming Horizontal Pulling Exercises:
Now you know what and how; the next answer you need is how to work them into your workout plan.
Frequency: Include horizontal pulling exercises 2-3 times per week, depending on your overall workout split. If you follow a push-pull-legs routine, ensure each pull day incorporates at least one horizontal pulling movement.
Sets and Reps: Aim for 3-4 sets of 8-12 reps for hypertrophy, adjusting the weight so that the last few reps are challenging but maintainable with good form. For strength-focused sessions, use heavier weights with lower reps (4-6), and for endurance, increase reps (15-20) with lighter weights.
Balancing with Horizontal Pushing: To maintain upper body balance, pair your horizontal pulling exercises with an equivalent volume of horizontal pushing exercises, such as bench presses or push-ups. This balance helps prevent muscle imbalances and promotes joint stability. For added fun, superset your horizontal pulls with a horizontal push exercise. Your whole upper body will feel pumped up!
Progressive Overload: To continue making progress, gradually increase the weight, reps, or sets over time. Incorporate techniques like drop sets, tempo variations, or supersets to keep your workouts challenging and engaging.
Wrap-Up
Horizontal pulling exercises are indispensable for anyone looking to build a strong, balanced 3D upper body. By focusing on proper form, consistent progression, and a variety of movements, you can effectively target the key muscles of your back and enhance your overall fitness. Incorporate these exercises into your routine to improve posture, prevent injuries, and achieve a well-rounded, powerful physique. Soon enough, you’ll look like you’re wearing a backpack full of muscle.